
How to Track Shopify Revenue in Google Analytics
By: Jonathan Stec
Published: December 29th, 2022
Quick Notes (don’t worry, I will go into more detail but keep these in mind as we proceed)
- You must use a Universal Analytics property in Shopify. You cannot use a Google Analytics 4 property until March 2023.
- When setting up Universal Analytics, make sure you have eCommerce Tracking turned “on” in the ecommerce settings.
- You will see references to “Enhanced Ecommerce” in both Google Analytics and Shopify. If you want to get tracking up ASAP, skip this for now. Your tracking will still work fine.
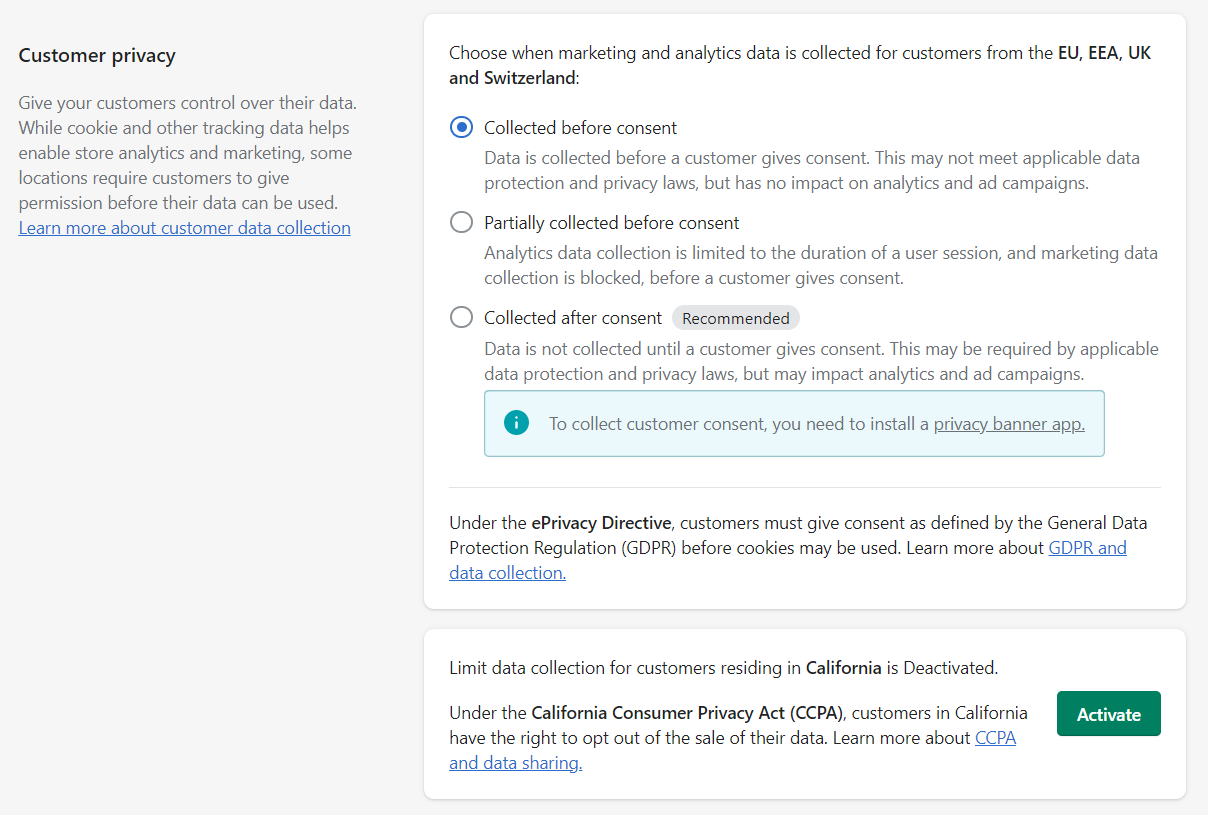
- YOUR DATA MAY NOT TRACK. In the “Customer Privacy” section, it may default to “Collected after consent”. You will need to change this to “Collected before consent” and add a Privacy Popup.
How to track Shopify revenue in Google Analytics
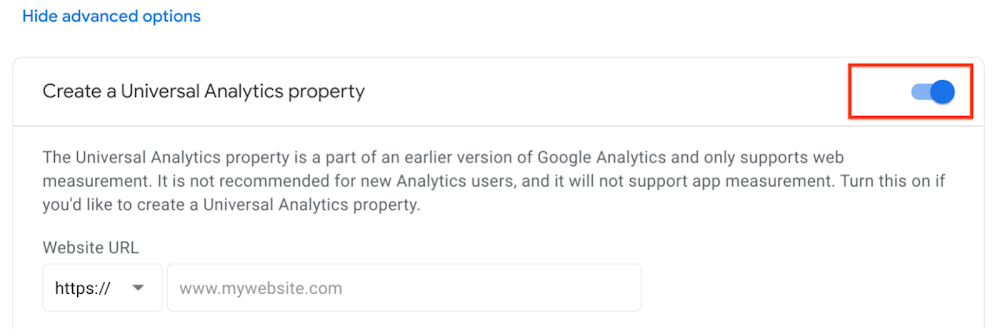
Step 1: Set up a Google UNIVERSAL Analytics account (not Google Analytics 4). You will make this designation within the “Advanced Options” section of the property: 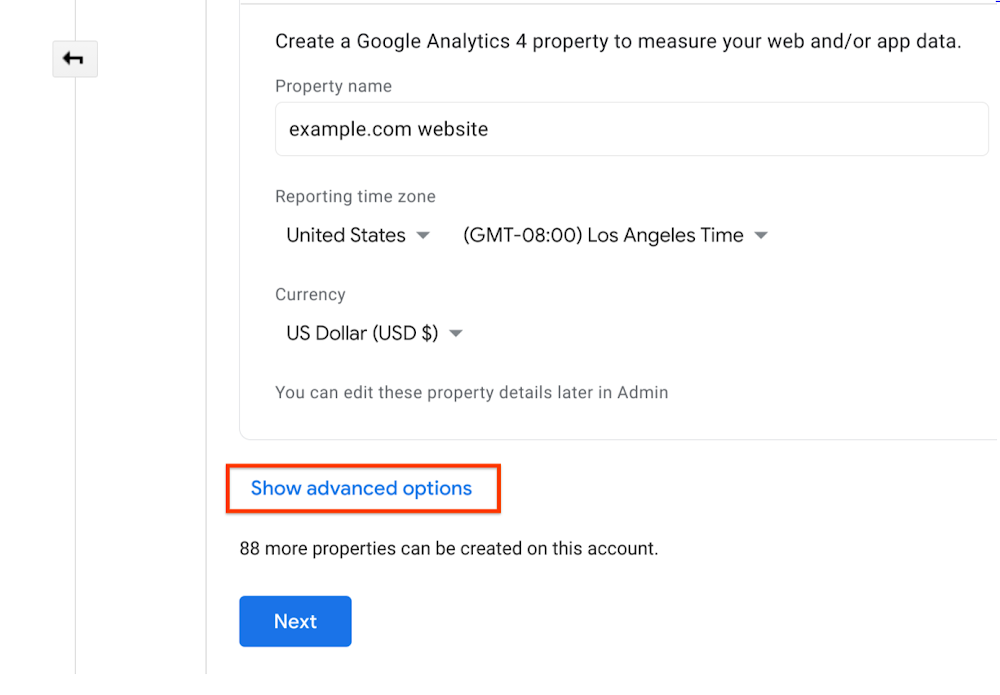
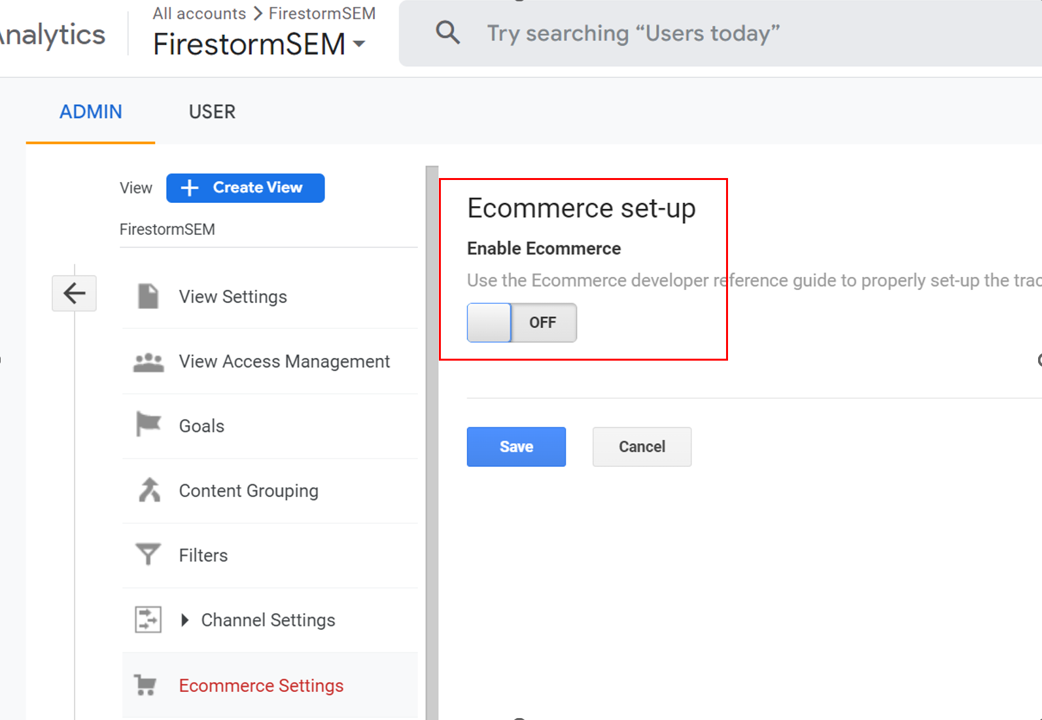
Step 2: Turn the switch on for “Enable Ecommerce” within the “Ecommerce Settings” of the view you created: 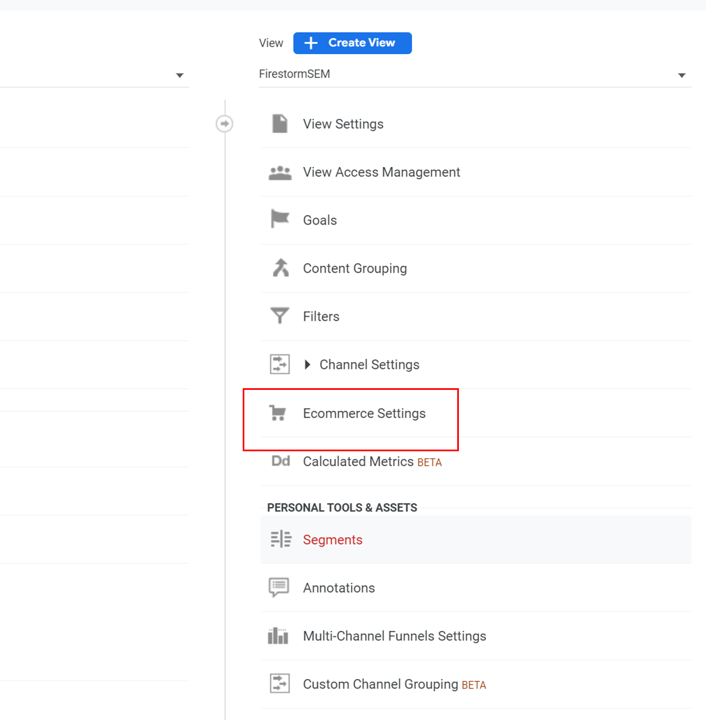
Step 3: Copy your tracking code from the “Tracking Info” section within the “Property” section: ![]()
![]()
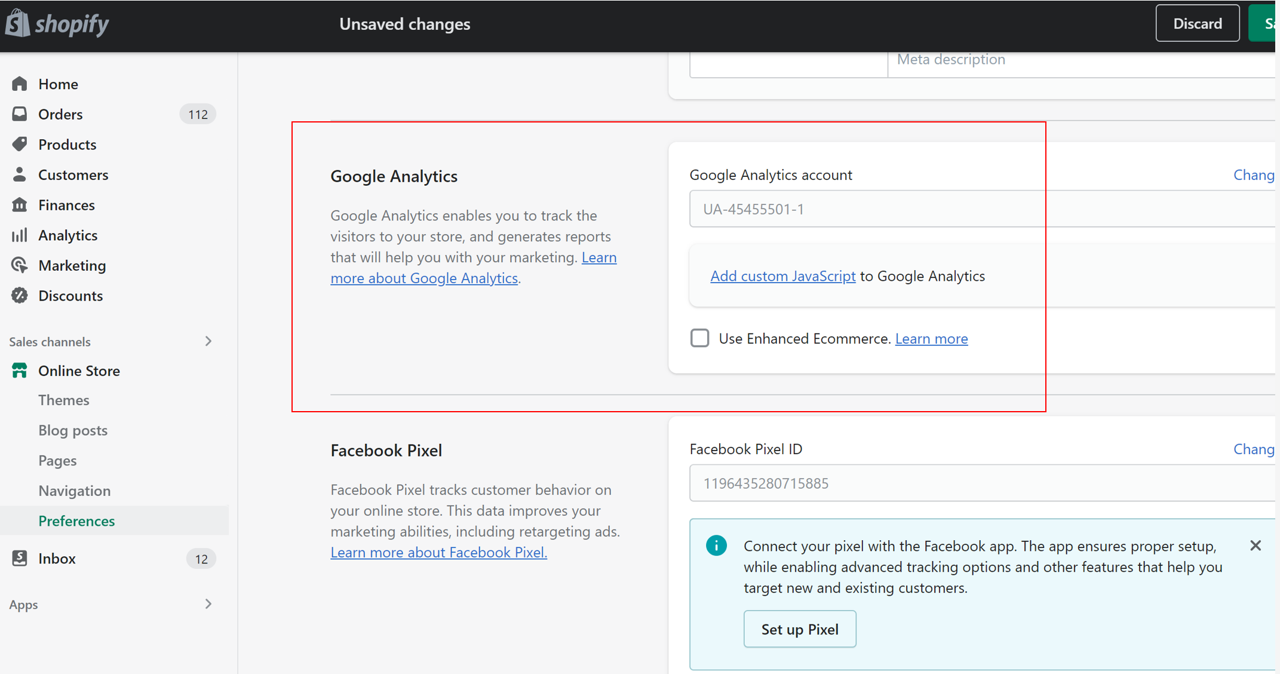
Step 4: Log in to your Shopify store, look for “Online Store” on the left, click on it, then “Preferences”, then scroll down until you see the section for “Google Analytics”. Paste your code and make sure to hit “Save”:
Step 5: Your data will not track if the “Customer privacy” is not set to “Collected before consent”. Depending on the area where you do business there are rules to follow (GDPR in your operate in the EU and CCPA for California). Be sure to add whatever popups to gain consent, etc that is needed for the area you do business.
Optional Step 6: Enable Enhanced Ecommerce by ticking off the box in the Shopify section (see within the screenshot above) and to also turn it on within Google Analytics in the Ecommerce Settings section. This is optional, and if you want to get tracking ASAP, skip this step until you have a need for the enhanced reporting.
That’s it! You should start seeing data flow in within about 24 hours. You can check if your set up is correct by opening a tab with your site, then opening another tab in Analytics and going to the “Real Time” section. You should see yourself as a live visitor in that section. COOL! I also recommend to do a test purchase on your site to verify the ecommerce tracking is working.


Leave A Comment
You must be logged in to post a comment.